@Castorke

PSP - Easter lesson 28


Translated by Marion into French, English, German

Thanks Marion

Click on the flag for the translation.


This lesson was written by myself

Any resemblance with an existing lesson is a coincidence

This tutorial was made with Psp 9 but can be done with other versions of Psp

The colours may vary significantly depending on the Psp used. . .

Material:
Tubes : Castorke,

Thanks to the tubsters for the beautiful material.

Without them, this lesson would not be possible.

Respect their work, don't change anything about the tubes and don't say they are your tubes

The copyright belongs to the original artist.
Leave credit with the creator.

PLUGINS: AAA Frames/ Foto Frame...

 
Material

Let's start the lesson


Take me with you, I'll show you where you left off.

Open the tubes in a map of your choice or in the program PSP.
 

Save your work regularly!
ATTENTION: Duplicate your tubes and work with the copies

1. Open the Color palette_lesson 28

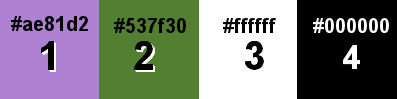
 Material Properties: Set your Foreground color to color #ae81d2 (color 1)

Set your Background color to color  #537f30 (color 2)

Color 3  #ffffff

Color 4 #000000

2. File-Open a New Transparent Image in this size : 900 X 600 Px

3. Flood Fill Tool – Fill the layer with the Foreground color =1

4. Open the Tube:  deco1

5. Edit-Copy

6. Activate your work 

7. Edit- Paste as new layer 

8. Layers- Merge-Merge Down

9. Effects- Image Effects- Seamless Tiling using the default settings

10. Layers- Duplicate

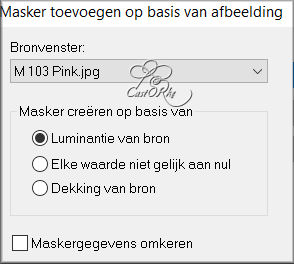
11. Open the mask M 103 Pink and minimize. 

12. Activate your work 

13. Layers- New Mask Layer-From Image and select Mask

14. Layers- Merge-Merge Group

15. You see nothing now

16. Effects-3D-Effects- Drop Shadow with these settings: 1, 1, 100, 0 Color  4 - (black)

17. Activate the bottom of the layer palette =Raster 1

18. Open  the Tube: AG2 _les28

19. Edit-Copy

20. Activate your work 

21. Edit- Paste as new layer 

22. Layers- Properties-Reduce the opacity of this layer to 70%

23. Activate the top of the layer palette 

24. Layers- New Raster Layer

25. Flood Fill Tool – Fill the layer with the Background color =2

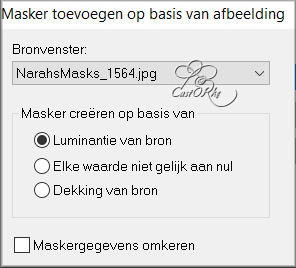
26.  Open the mask- NarahsMasks_1564 and minimize. 

27. Layers- New Mask Layer-From Image and select mask

28. Layers- Merge-Merge Group

29. Layers- New Raster Layer

30. Flood Fill Tool – Fill the layer with color #ffffff=3

31.  Open the mask NarahsMasks_1572 and minimize. 

32. Layers- New Mask Layer-From Image and select mask

33. Layers- Merge-Merge Group

34. Effects-3D-Effects- Drop Shadow with the same settings

35. Layers- Merge-Merge All

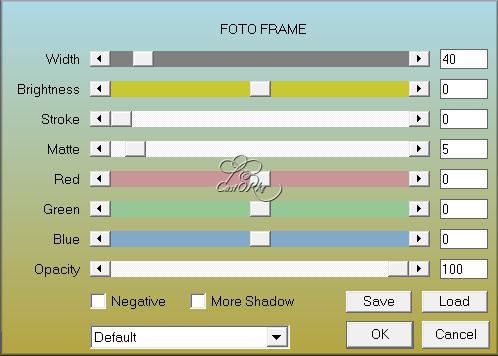
36. Effects-Plugins- AAA Frames: Foto Frame….

Width 40, Matte 5

37.Now place the tubes as you wish, or continue with the lesson...

38. Open the Tube;  0_1273e8_8d20573c_XL2

39. Edit-Copy

40. Activate your work 

41. Edit- Paste as new layer 

42. Effects-3D-Effects- Drop Shadow with these settings: 0, ( -35), 30, 30 color 4

43.  Pick Tool: (K) on your keyboard -Enter these parameters on the Toolbar

Position  X 0--- Position  Y 16

44. Open the Tube : 148113238_22325996

45. Edit-Copy

46. Activate your work 

47. Edit- Paste as new layer 

48.  Pick Tool: (K) on your keyboard -Enter these parameters on the Toolbar

Position  X 46--- Position  Y 7

49. Effects-3D-Effects- Drop Shadow with these settings: 0, ( -35), 30, 30 kleur 4

50. Open the Tube : deco4

51. Edit-Copy

52. Activate your work 

53. Edit- Paste as new layer 

54.  Pick Tool: (K) on your keyboard -Enter these parameters on the Toolbar

 Position  X 283 --- Position  Y 419

55. Open the Tube :  deco1

56. Edit-Copy

57. Activate your work 

58. Edit- Paste as new layer 

59.  Pick Tool: (K) on your keyboard -Enter these parameters on the Toolbar

 Position  X 633--- Position  Y 319

60. Open the Tube:  deco2

61. Edit-Copy

62. Activate your work 

63. Edit- Paste as new layer 

64.  Pick Tool: (K) on your keyboard -Enter these parameters on the Toolbar

 Position  X 283, Position  Y 419

65. Layers- Arrange- Move -Down  3 x

(second layer from the bottom)

66. Activate the top of the layer palette 

67. Open  the Tube: Text_les28

68. Edit-Copy

69. Activate your work 

70. Edit- Paste as new layer 

71. Pick Tool: (K) on your keyboard -Enter these parameters on the Toolbar

Position  X 455, Position  Y 85

72. Place your name or watermark

73.Save as JPG


I hope you enjoyed this lesson

I look forward to seeing your work.
Send it to me in original size.

To see your achievements Here

Please do include your name and the number of this lesson

Good luck!

Thank you all for making this lesson

Questions related to the lesson ? Or submit the lesson? Mail me

Greetings  Castorke
 

Copying this lesson, in whole or in part, without the author's permission is prohibited.

The lessons are registered with TWI
België
2021