Click on the flag for the translation..
This lesson was written by myself
Any resemblance with an existing lesson is a coincidence
This tutorial was made with Psp 9 but can be done with other versions of Psp
The colours may vary significantly depending on the Psp used. . .
Material:
Tubes : Thafs, elementen uit scraps ~SND-HereComesEaster, Sweet Easter.
Font: Easter Egg
Thanks to the tubsters for the beautiful material..
Without them, this lesson would not be possible.
Respect their work, don't change anything about the tubes and don't say they
are your tubes
The copyright belongs to the original artist.
Leave credit with the creator.
Filters: I-Decay_Cyclic Wrap,
Import the filter into unlimited 2
Material
Let's start the lesson
Take me with you, I'll
show you where you left off.

Open the tubes in a map of your choice or in the program PSP.
Save your work regularly !
Attention: Duplicate your tubes and work with the copies
.
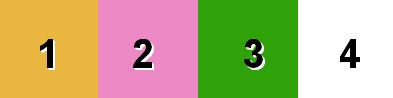
1. Colors : Color 1 - #e9b63f , Color 2- #ec89c4, Color 3 - #2fa309,
Color 4 - #ffffff
2. Open alpha channel_lessons 26
3. Shift+D Duplicate
4. Close Original-
We work on the copy
5. Open: pas_les26AG
6. Edit- Copy
7. Edit-Paste as new layer
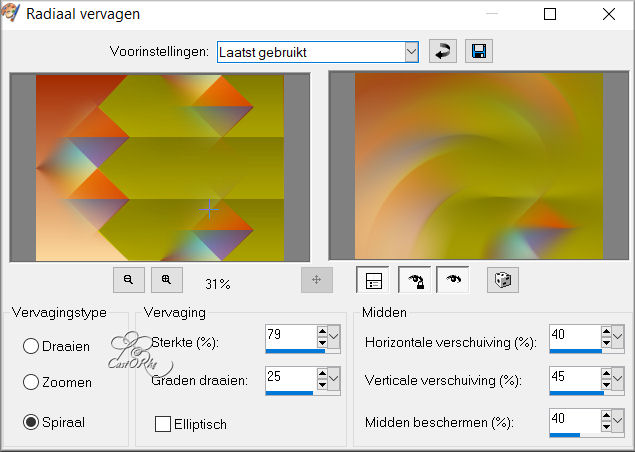
8. Adjust-Blur-Radial Blur use the settings below
Twirl, Elliptical not checked, 79, 25, 40, 45, 40
9. Effects-Edge Effects- Enhance
10. Effects-Plugins- Funhouse - Faceter using the default settings
11. Open
the Tube: SND-E_32
12. Edit- Copy -Activate your work
- Edit-Paste as new layer
13. Pick Tool: (K) on your keyboard -Enter these parameters on the
Toolbar
Position X (-24) - -Position Y 354
14. Layers-Properties-Set the Blend Mode to " Screen "
15. Layers- Duplicate
16. Pick Tool: (K) on your keyboard -Enter these parameters on the Toolbar
Position X (-59) -- Position Y 409
17. Layers-Properties-Set the Blend Mode to " Luminance"
18. Layers- Duplicate
19. Pick Tool: (K) on your keyboard -Enter these parameters on the Toolbar
Position X (-39) -- Position Y 460
20. Layers-Properties-Set the Blend Mode to " Luminance" (legacy)
21. Layers- Duplicate
22. Pick Tool: (K) on your keyboard -Enter these parameters on the Toolbar
Position X 282 -- Position Y 410
23. Layers-Properties-Set the Blend Mode to " Normal"
24. Layers- Duplicate
25. Pick Tool: (K) on your keyboard -Enter these parameters on the Toolbar
Position X 239 --Position Y 460
26. Layers-Properties-Set the Blend Mode to " Multiplikation "
27. Layers- Merge- Merge Visible
28. Open the Tube : femme_au_lapin_tubed_by_thafs
29. Edit- Copy -Activate your work
- Edit-Paste as new layer
30. Image-Resize 75%
Resize all layers not checked
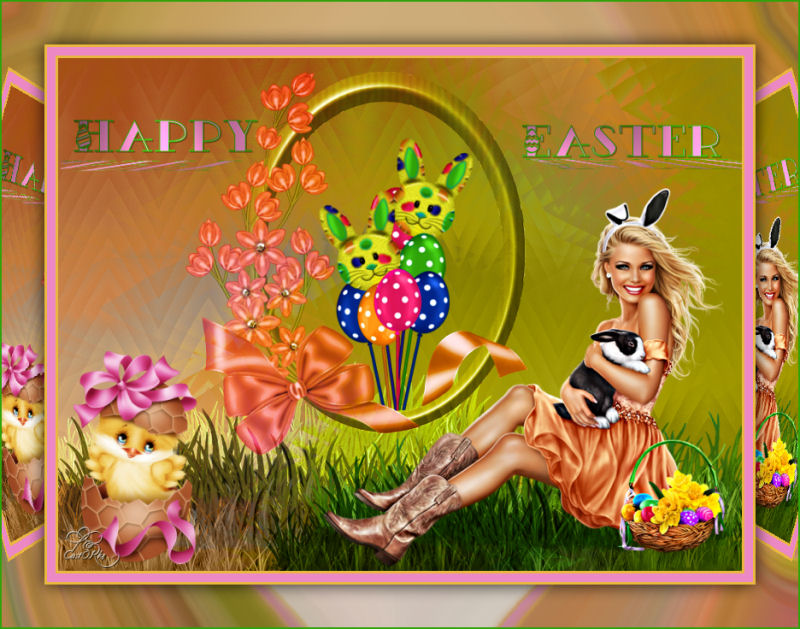
31. Place at the bottom right as in the example or as you choose.
32. Effects- 3D-Effects-Drop Shadow with these settings: 0, 0, 40, 30
Color black.
33. Open the Tube : SND-E-2
34. Edit- Copy -Activate your work
- Edit-Paste as new layer
35. Image-Resize 75%
36. Pick Tool: (K) on your keyboard -Enter these parameters on the Toolbar
Position X 170 -- Position Y 20
37. Layers-Properties-Set the Blend Mode to " Hard Light "
38. Effects- 3D-Effects-Drop Shadow with these settings: 0, 0, 20, 30 Color
black.
39. Open the Tube : el_8
40. Edit- Copy -Activate your work
- Edit-Paste as new layer
41. Image-Resize 2x 80%
42. Pick Tool: (K) on your keyboard -Enter these parameters on the Toolbar
Position X 322 -- Position Y 100
43. Selections/Load/Save Selection/Load Selection from Alpha Channel-
Selection # 1
44. Press Delete
45. Selections- Deselect All
46. Layers- Duplicate
47. Layers-Properties-Set the Blend Mode to " Multiplikation "
48. Open the Tube ; SN-E-3
49. Edit- Copy -Activate your work
- Edit-Paste as new layer
50. Image-Resize 80%
51. Effects- 3D-Effects-Drop Shadow with these settings: 0, 0, 40, 30 Color
black.
52. Place in the bottom left corner.
53. Open the Tube : castorke_text_1
54. Edit- Copy -Activate your work
- Edit-Paste as new layer
55. Place to your liking
56. Image - Add Borders-Symmetric
checked: 3 Px -Color 1 - #e9b63f
57. Image - Add Borders-Symmetric checked: 10 Px -Color 2 - #ec89c4
58. Image - Add Borders-Symmetric checked: 3 Px -Color 1 - #e9b63f
59. Selections- Select All
60. Image - Add Borders-Symmetric checked: 50 Px -Color 4 - #ffffff
61. Effects- Image Effects- Seamless Tiling using the default settings
62. Selections- Invert.
63. Adjust-Blur-Radial Blur with the same settings
64.
Effects-Plugins-Filters in Unlimited 2/ I-Decay / Cyclic Warp using the
default settings
1, 1, 1, 0
65. Selections- Invert
66. Effects- 3D-Effects-Drop Shadow with these
settings: 0, 0, 85, 30 Color black.
67. Selections- Deselect All
68. Place your name or watermark
69. Image - Add Borders-Symmetric checked: 2 Px -Color 3 - #2fa309
70. Image-Resize 800 Px.
71. Save as JPG
I hope you enjoyed this lesson
I look forward to seeing your work.
Send it to me in original size.
To see your achievements. Hier
Please do include your name and the number of this lesson
Good Luck !
Thank you all for making this lesson
Questions related to the lesson ? Or submit the lesson?
Mail me
Greetings Castorke


Copying this lesson, in whole or in part, without the
author's permission is prohibited.
The lessons are registered with TWI
België
2021