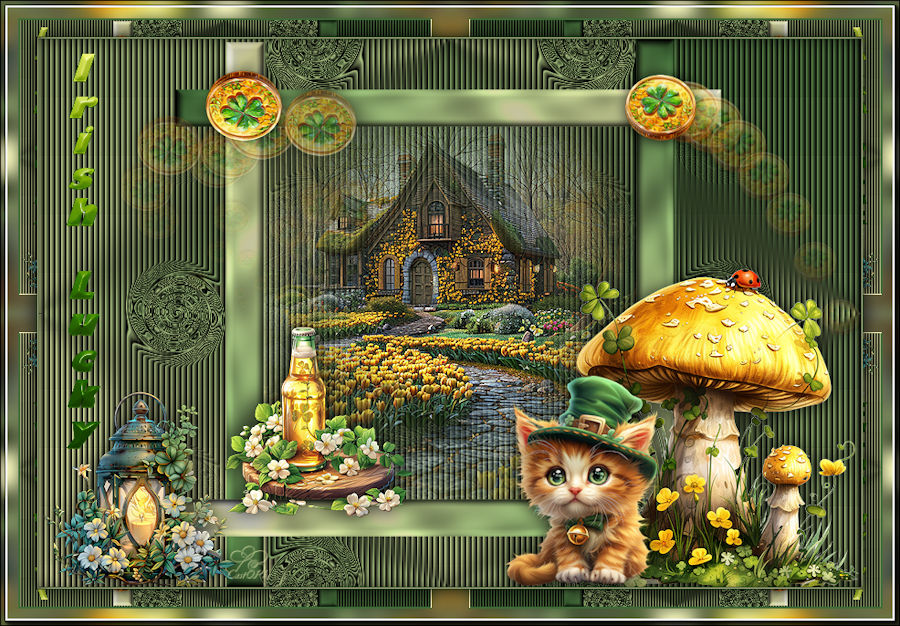
Psp Div3_Lesson 246
Thank you Marion
Translated by Marion into French, English, German
Click on the flag for the translation.. Without them, this lesson would not be possible. AAA Frames/ Foto Frames…, *** Graphics Plus, MuRa's Meister/ copies Material Take me with you,
I'll show you where you left off.
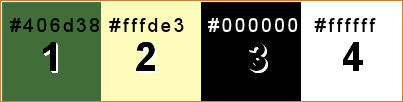
Open the Color palette lesson 246 1. Open Castorke Alpha Channel lesson 246 2. SHIFT + D we continue
working on the copy
3. Material Properties: Set your Foreground color to color 1 -Set your
Background color to color 2
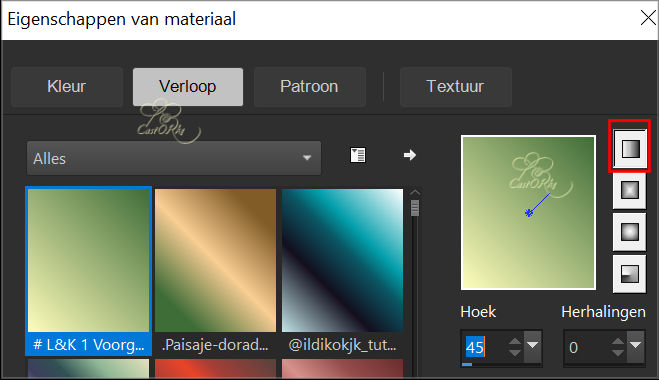
4. Replace your Foreground color with a Foreground/Background Linear Gradient
configured like this 45 - 0
5. Flood Fill Tool-Fill the layer with the Gradient.
6. Effects- Distorsion Effects -Pixelate use the settings below
7. Effects- Edge Effects- Enhance.
8. Layers- New Raster Layer
9. Selections/Load/Save Selection/Load Selection from Alpha Channel -
Selection 1
10. Flood Fill Tool-Fill the
selection with the Gradient.
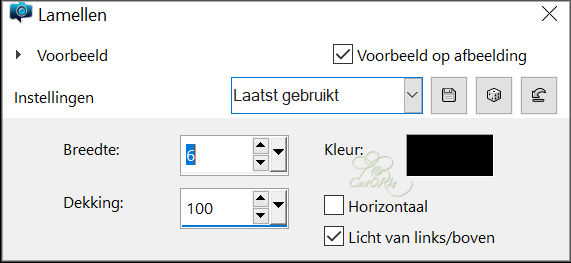
11. Effects- Texture Effects -Blinds use the settings below
12. Selections- Deselect All
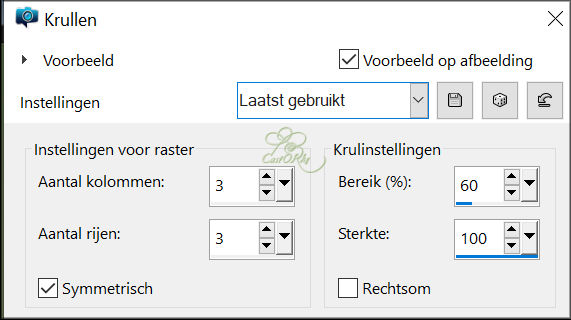
13. Effects- Distortion Effects-Curlicues use the settings below 14. Layers- Duplicate
15. Image - Mirror - Mirror Horizontal (Image - Mirror in older versions of
PSP) 16. Layers- Merge- Merge Down 17. Effects- Image Effects- Seamless Tiling -using the default settings 18. Effects- 3D- Effects- Drop Shadow with these settings: 0, 0, 75, 30
Color 3 (black)
19. Activate the bottom layer in the layer palette=Raster 1
20. Effects- Texture Effects -Blinds with the same settings 21. In the
layer palette-activate Raster 2 .
22. Open the image: les246_AG
23. Edit-Copy.
24. Activate your work
25. Edit-Paste as new layer
26. Adjust- Sharpness-Sharpen
27. Layers- New Raster Layer
28. Selections/Load/Save Selection/Load Selection from Alpha Channel -
Selection 2
29. Material Properties:Switch colors FG-Color 2 and BG-Color 1.
30. Flood Fill Tool – Fill the selection with the Gradient .
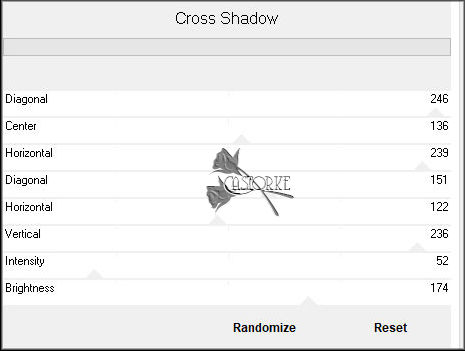
31. Effects- Plugins- Filter in Unlimited 2/ Graphics Plus/ Cross Shadow
use the settings below.
246, 136, 239, 151, 122, 236, 52, 174.
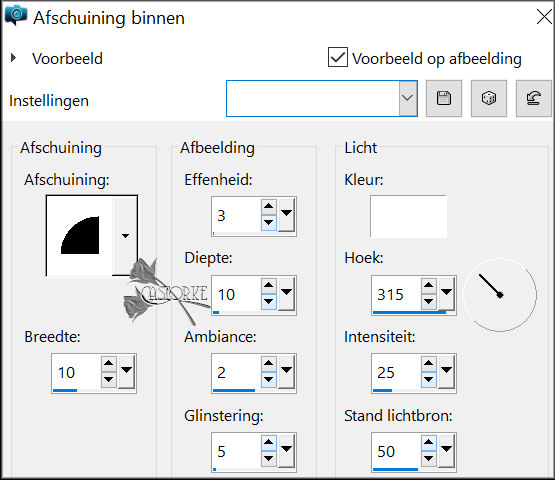
32. Effects-3D-Effects- Inner Bevel use the settings below 33. Selections- Deselect All
34. Layers- Dulicate 35. Image - Mirror - Mirror Horizontal (Image - Mirror
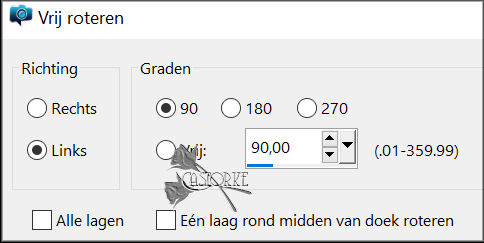
in older versions of PSP) 37. Layers- Merge- Merge Down 38. Layers- Duplicate 39. Image- Free Rotate-90-Left 40. Layers- Merge- Merge Down 41. Open the Tube : Irish Kisses Element (61)
42. Edit-Copy.
43. Activate your work
44. Edit-Paste as new layer
45. Image- Resize 50%
Resize all layers not checked
46. Adjust- Sharpness-Sharpen.
47. Move to the right ( see finished image) 48. Effects- 3D- Effects-
Drop Shadow with these settings: 0, 0, 75, 30 Color 3 (black)
49. Open the Tube: Irish Kisses Element (64)
50. Edit-Copy.
51. Activate your work
52. Edit-Paste as new layer
53. Image- Resize 1 x 50% and 2 x 80% 54. Place the tube of
your choice
55. Adjust- Sharpness-Sharpen
56. Effects- 3D- Effects- Drop Shadow with these settings: 0, 0, 75, 30
Color 3 (black)
57. Open the Tube: les246_deco1
58. Edit-Copy.
59. Activate your work
60. Edit-Paste as new layer
61. Pick Tool: (K) on your keyboard -Enter these parameters on the Toolbar
Position X 80 , Position Y 17 or by your own choice.
62. Open the Tube : les246_deco 2
63. Edit-Copy.
64. Activate your work
65. Edit-Paste as new layer
66. Place the tube of your choice
67. Open : text2
68. Edit-Copy.
69. Activate your work
70. Edit-Paste as new layer
71. Move to the left side 72. Open the Tube: Irish Kisses Element (95)
73. Edit-Copy.
74. Activate your work
75. Edit-Paste as new layer
76. Image- Resize 30%
77. Adjust- Sharpness-Sharpen
78. Place the tube of your choice
79. Effects- 3D- Effects- Drop Shadow with these settings: 0, 0, 75, 30
Color 3 (black)
80. Open the Tube; Irish Kisses Element (113)
81. Edit-Copy.
82. Activate your work
83. Edit-Paste as new layer
84. Image- Resize 30%
85. Adjust- Sharpness-Sharpen
86. Effects- 3D- Effects- Drop Shadow with these settings: 0, 0, 75, 30
Color 3 (black)
87. Add you watermark on new layer 88. Image - Add
borders-Symmetric checked: 1 Px -Color 1
89. Image - Add borders-Symmetric checked: 1 Px -Color 2
90. Image - Add borders-Symmetric checked: 1 Px -Color 1
91. Selections- Select All 92. Image - Add borders-Symmetric checked: 40 Px
Color 2
93. Effects- Image Effects- Seamless Tiling -using the default settings 94. Selectione- Invert
95. Adjust- Blur-Gaussian Blur-Radius 20.
96. Effects- Plugins-Filter in Unlimited 2/ Graphics Plus/ Quick Tile I
using the default settings 97. Effects- Plugins-AAA Frames/ Foto Frames…
Width 5, Matte 2
98. Effects- 3D- Effects- Drop Shadow with these settings: 0, 0, 75, 30
Color 3 (black)
99. Selections- Invert 100. Effects- 3D- Effects- Drop Shadow with these
settings: 0, 0, 75, 30 Color 3 (black)
101. Selections- Deselect All
102. Image- Resize 900 Px width (Height adjusts itself)
103. Save as JPG
Copying this lesson, in whole or in part, without the author's permission is
prohibited. ©Webdesign Diane
This lesson was written by myself![]()
![]()
![]()
Any resemblance with an existing lesson is a coincidence
This tutorial was made with Corel X8 but can be done with other versions of
Psp
The colours may vary significantly depending on the Psp used. . .
Respect their work, don't change anything about the tubes and don't say they
are your tubes
The copyright belongs to the original artist.
Leave credit with the creator.
https://adriennesdesigns.blogspot.com/
*** Import this filter into
Unlimited 2.

Let's start the lesson
![]()

Close the original
![]()
36. Image - Mirror - Mirror vertical ( Image - Flip in older versions of
PSP)
I am curious to see your work.
Please send it to me in original size.
.
I'll post it with the other works
Please do include your name and the lesson number and title.
Questions related to the lesson ? Or submit the lesson ? Email me


The lessons are registered with TWI.