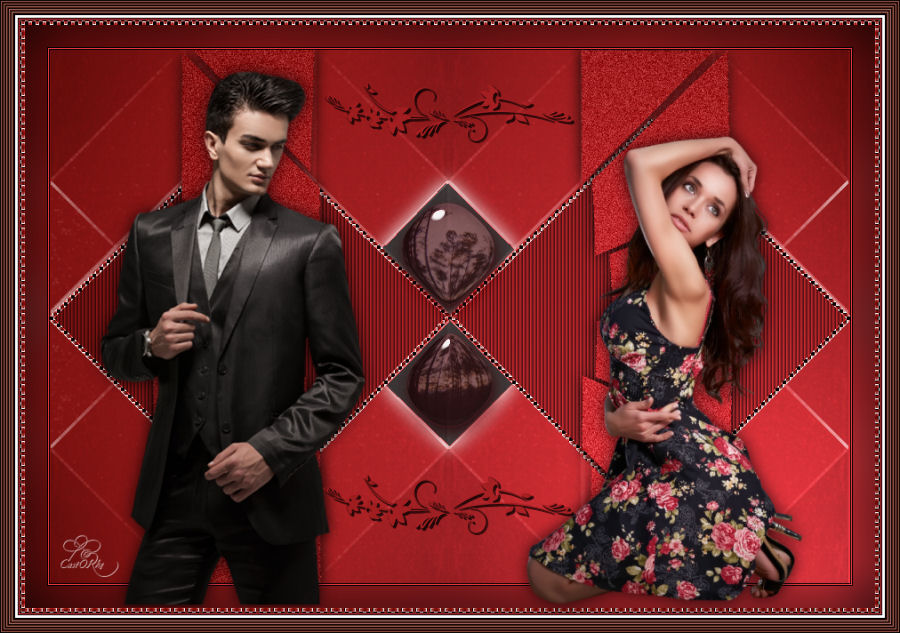
Psp Div3_lesson 245
Translated by Marion into French, English, German Thanks Marion
Click on the flag for the translation..
AAA Frames/ Frame Works Take me with you, I'll show you where you left off.
Open the Color palette lesson 245 1. Open Castorke Alpha Channel lesson 245 2. SHIFT + D we continue working
on the copy
Close the original
3. -Material Properties: Set your Foreground color to color 1 -Set
your Background color to color 2
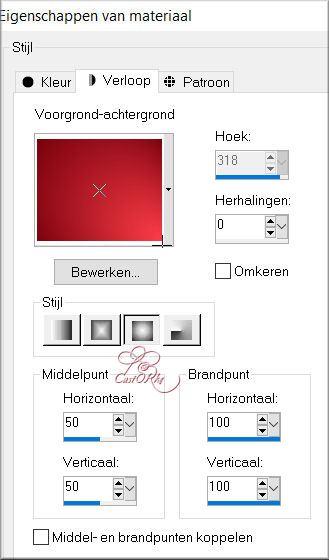
Replace your Foreground color with a Foreground/Background Sunburst
Gradient configured like this Flood Fill Tool-Fill the layer with the
Gradient 4. Selections/Load/Save Selection/Load Selection from Alpha Channel -
Selection 1
5. Selections- Promote Selection to Layer 6. Selections- Deselect All
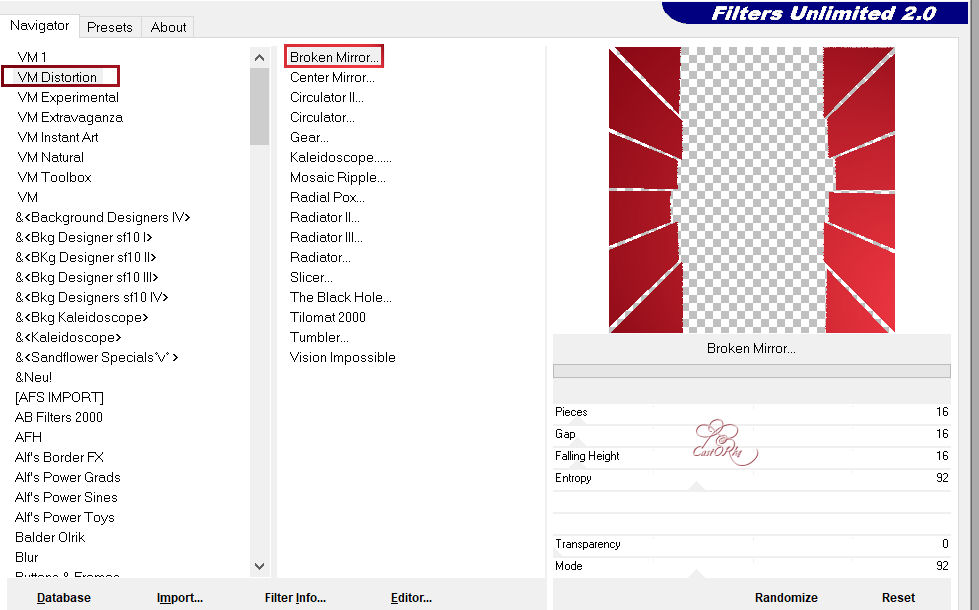
7. Effects-Plugins -Filter in Unlimited 2/ VM Distorsion/ Broken Mirror.
using the default settings You see nothing now, will be fine in the next edit
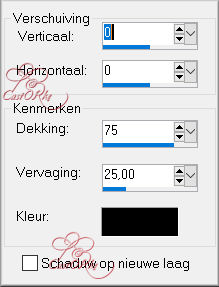
8. Effects-3D-Effects- Drop Shadow with these settings: 0, 0, 75, 25 Color Black.
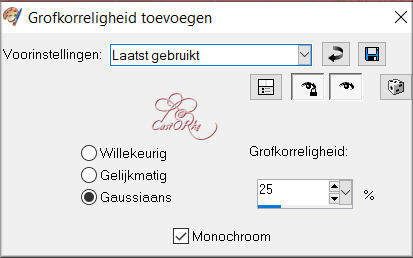
9. Adjust-Add/Remove Noise-Add Noise use the settings below-Gaussian 25
10. Activate the bottom of the layer palette =Raster 1
11. Selections/Load/Save Selection/Load Selection from Alpha Channel - Selection 2
12. Selections- Promote Selection to Layer.
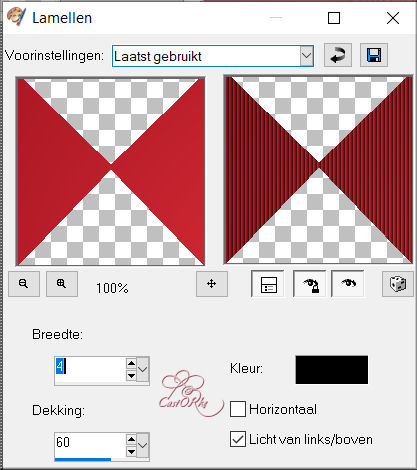
13. Effects-Texture Effects- Blinds use the settings below :
4 ---60---color black---- Light from left/top checked.
14. Layers- New Raster Layer.
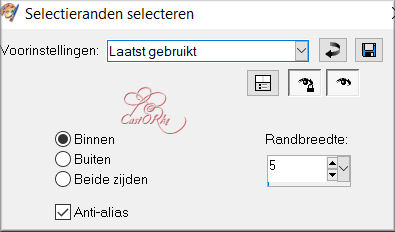
15. Selections-Modify-Select- Selection Borders-Inside 5
16. Flood Fill Tool-Fill the selection with the Background color 2
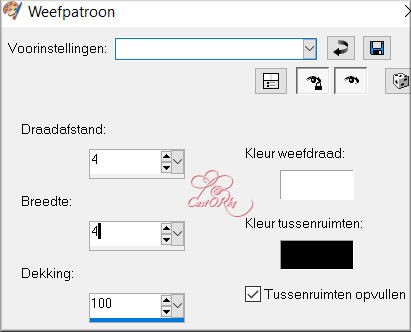
17. Effects-Texture Effects-Weave use the settings below
4 --- 4 ---100 --- color white --- color black
18. Selections- Deselect All
19. Effects-Edge Effects- Enhance
20. Activate the bottom of the layer palette =Raster 1
21. Open the Background Image; Ag_les245
22. Edit-Copy.
23. Activate your work
24. Edit-Paste as new layer..
25. Layers-Properties-Set the Blend Mode to " Hard Light"
26. Effects-Edge Effects-Dilate
27.Selections/Load/Save Selection/Load Selection from Alpha Channel - Selection 3
28. Layers- New Raster Layer
29. Set the Foreground color to color 3
Flood Fill Tool-Fill the selection with color 3 Selection-Deselect All
30. Open the Tube: castorke_deco1_les245
31. Edit-Copy.
32. Activate your work
33. Edit-Paste as new layer..
34. Effects-3D-Effects-Drop Shadow with these settings: 0, 0, 75, 25 Color White
35. Open the Tube: castorke_deco_les245
36. Edit-Copy.
37. Activate your work
38. Edit-Paste as new layer..
39. Image - Add Borders-Symmetric checked: 1 Px -Color 5
40. Image - Add Borders-Symmetric checked: 1 Px -Color 1
41. Image - Add Borders-Symmetric checked: 1 Px -Color 5
42. Edit-Copy.
43. Selections- Select All
44. Image - Add Borders-Symmetric checked: 25 Px -Color 4
45. Selections- Invert
46. Edit-Paste into Selection
47. Adjust-Blur- Gaussian Blur- Radius 30.
48. Selections- Select All
49. Image - Add Borders-Symmetric checked: 5 Px -Color 2
50. Selections- Invert
51. Effects-Texture- Effects-Weave with the same settings.
52. Effects-Edge Effects- Enhance More
53. Selections- Deselect All
54. Image - Add Borders-Symmetric checked: 1Px -Color 5
55. Image - Add Borders-Symmetric checked: 1 Px -Color 1
56. Image - Add Borders-Symmetric checked: 1 Px -Color 5
57. Selections- Select All
58. Image - Add Borders-Symmetric checked: 25 Px -Color 4
59. Selections- Invert
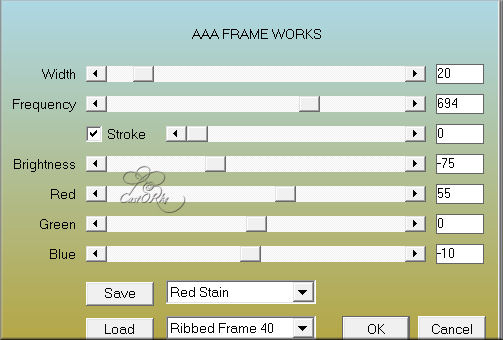
60. Effects- Plugins-AAA Frames/ Frame Works use the settings below Width 20,
61. Open the Tube : castorke_tube_dames_137_092012_2437558
62. Edit-Copy.
63. Activate your work
64. Edit-Paste as new layer..
65. Image- Resize 75%
Resize all layers not checked.
66. Image - Mirror - Mirror Horizontal (Image - Mirror in older versions of
PSP)
67. Slagschaduw 0,0,0,75, 25 -color zwart.
68. Open the Tube : castorke_tube25_man_062014_png
69. Edit-Copy.
70. Activate your work
71. Edit-Paste as new layer..
72. Image- Resize 65%
Resize all layers not checked.
73. Delete the name.
74. Effects-3D-Effects-Drop Shadow with these settings: 0,0,0,75, 25 -Color Black
75.Place your name or watermark
76. Layers-Merge- Merge All ( flatten)
77. Image- Resize 900 Px Width
78. Save as JPG
![]()
![]()
![]() This lesson was written by myself
This lesson was written by myself
Any resemblance with an existing lesson is a coincidence
This tutorial was made with Corel X8 but can be done with other versions of
Psp
The colours may vary significantly depending on the Psp used. . .
Thanks to the tubsters for the beautiful material.
Without them, this lesson would not be possible.
Respect their work, don't change anything about the tubes and don't say they
are your tubes
The copyright belongs to the original artist.
Leave credit with the creator.
Material:
Tubes: Castorke
Filters:
*** VM Distorsion/ Broken Mirror
*** Import this filter into Unlimited 2.
Let's start the lesson
![]()
Open the tubes in a map of your choice or in the program PSP.
Save your work regularly !ATTENTION: Duplicate
your tubes and work with the copies


I hope you enjoyed this lesson
I look forward to seeing your work.
Send it to me in original size.
I place it with the other examples.
Please do include your name and the number of this lesson

