Psp Div3_lesson 243
Marion translated into french, german and english
Thanks MarionClick on the flag for the translation.
Aliën Skin/Eye Candy5/ Impact/ Glass, Aliën Skin/Eye Candy5/ Impact/ Perspective Shadow, Mehdi/ Sorting Tiles, AAA Frames/ Foto Frames….
Double-click the preset from Eye Candy 5 and it will automatically come into
the filter.
Take me with you, I'll show you
where you left off Info: Play with blend mode and the colors.
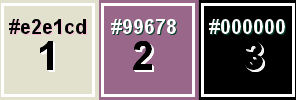
Open your color palette 243 in your psp
Material Properties: Set your Foreground color to color: #e2e1cd (1) Set
your Background color to color #99678a (2) Color 3: #000000 (black)
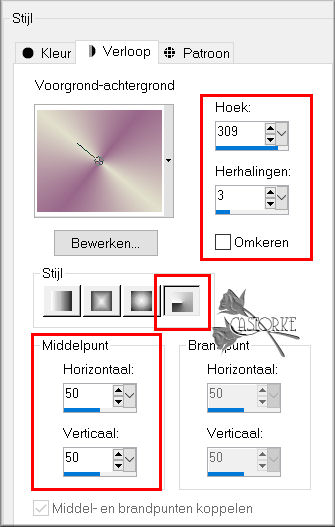
Replace your Foreground color with a Foreground/Background Radial Gradient
configured like this
Angle 309 - Repeats 3 - Centerpoint- H 50- V50
1. Open: Castorke Alpha Channel 243
2. ( SHIFT + D ) to duplicate- Close the original
3. Flood Fill Tool – Fill the layer with the Gradient .
4. Layers- New Raster Layer
5. Flood Fill Tool – Fill the layer with the Foreground color=1
6. Adjust-Add/Remove Noise-Add Noise use the settings below -Random 10%
7. Repeat: Adjust-Add/Remove Noise-Add Noise use the same settings
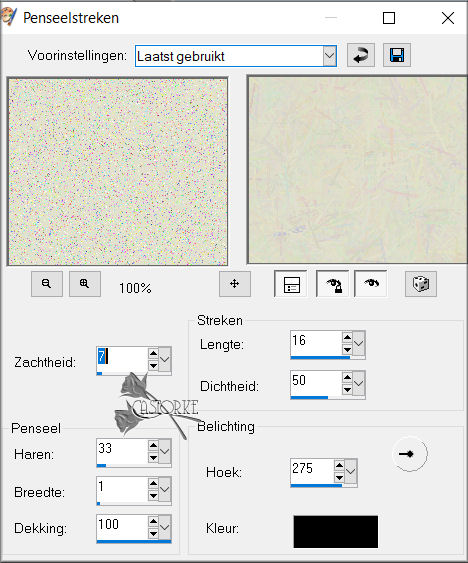
8. Effects- Art Media Effects- Brush Strokes use the settings below.
9. Effects- Edge Effects- Enhance More
10. Effects-Plugins - MuRa's Meister-Seamless/ Emboss at Alpha
using the default settings 11. Effects-Plugins
- Medhi- Sorting Tiles with these settings 12. Effects- Art Media Effects- Brush Strokes with the same settings 13.
Layers-Properties-Set the Blend Mode to " Exclusion" or another blend mode 14.
Selections/Load/Save Selection/Load Selection from Alpha Channel - Selection 1
15. Layers- New Raster Layer
16. Flood Fill Tool- Fill the Selection with the Foreground color =1
17. Layers-Properties-Set the Blend Mode to " Difference"
18. Selections-Invert
19. Effects- 3D- Effects- Drop Shadow with these settings: 0, 0, 75, 40 -color 3 (black)
20. Repeat: Effects- 3D- Effects- Drop Shadow with the same settings
21. Selections-Invert
22. Selections- Modify-Contract 30 Px 23. Selections- Modify-Select
Selection Borders-Inside 10 Px 24. Layers- New Raster Layer
25. Flood Fill Tool- Fill the Selection with the Foreground color=1
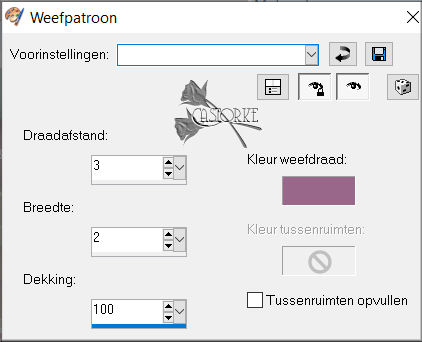
26. Effects-Texture Effects -Weave use the settings below- color 2
27. Effects- Edge Effects- Enhance.
28. Selections-Deselect All
29. Selections/Load/Save Selection/Load Selection from Alpha Channel -
Selection 2
30. Edit-Copy-Special-Copy Merged
31. Layers- New Raster Layer
32. Edit-Paste into Selection
33. Effects- Plugins- Eye Candy5/ Impact/ Glass - Clear.
34. Selections-Deselect All
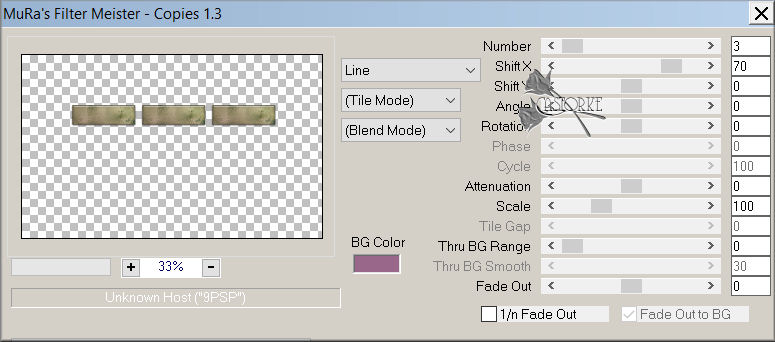
35. Effects-Plugins- MuRa's meister-Copies use the settings below-color 2
36. Effects- 3D- Effects- Drop Shadow with these settings: 0, 0, 100, 40
color 3 (black)
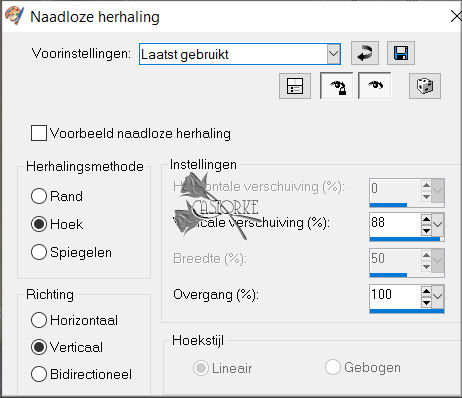
37. Effects- Image Effects- Seamless Tiling use the settings below
38. Layers- Duplicate 39. Layers- New Raster Layer
40. Selections/Load/Save Selection/Load Selection from Alpha Channel -
Selection 3
41. Flood Fill Tool- Fill the Selection with the Foreground color =1
42. Layers-Properties-Reduce the Opacity of this layer to 50%
43. Selections- Modify-Contract -10 Px.
44. Selections-Promote Selection to Layer
45. Layers- New Raster Layer
46. Selections- Modify-Contract- 5 Px 47. Flood Fill Tool- Fill the
Selection with the Background color = 2
48. Selections- Modify-Contract- 5Px
49. Delete
50. Activate the layer underneath
(Promoted Selection) 51. Effects-Texture Effects -Weave use the
settings below- color 2
52. Effects- Edge Effects- Enhance.
53. Repeat- Effects- Edge Effects- Enhance.
54. Layers- New Raster Layer
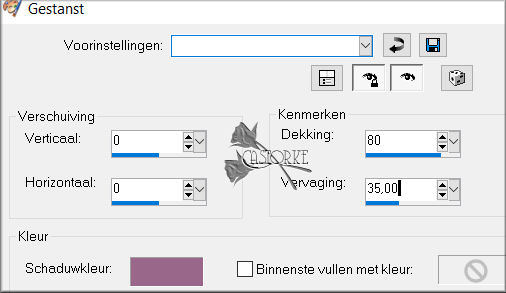
55. Effects-3D-Effects-Cutout with these settings-color 2 0, 0, 80, 35
56. Selections-Deselect All
57. Layers- Merge- Merge-Visible
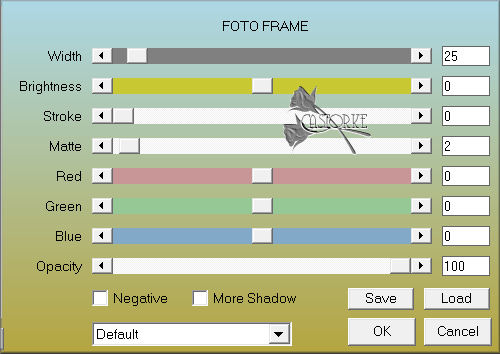
58. Effects-Plugins-AAA Frames- Foto Frames - Widht 25 Matte 2
59. Activate the Tube :Castorke_243_deco.
60. Edit- Copy
61. Activate your work.
62. Edit-Paste as new layer.
63. Pick Tool: (K) on your keyboard -Enter these parameters on the Toolbar Position X 168 ,
Position Y 148
64. Open the Tube :321-vmtubes.
65. Edit- Copy
66. Activate your work.
67. Edit-Paste as new layer.
68. Image- Free Rotate-90 Right
69. Image-Resize 2 X 80%
Resize all layers-not checked
70. Pick Tool: (K) on your keyboard -Enter these parameters on the Toolbar
Position X 120- Position Y 212 71. Adjust-Sharpness-Sharpen.
72. Effects- 3D- Effects- Drop Shadow with these settings: 0, 0, 60, 30
color 3 (black)
73. Effects-Plugins-Eye Candy 5/ Impact/ Perspective Shadow - Settings-
User Settings and select my file-Preset -Castorke_les 243
or Settings: Reflect in Front Basic: overall blur 50
74. Open the Tube : Riet_812_140122
75. Remove the name: Selection Tool-Rectangle- make a selection around the
name. Selections-Invert
76. Edit- Copy
77. Activate your work.
78. Edit-Paste as new layer.
79. Image-Resize 2 x 85%
80. Image - Mirror - Mirror Horizontal (Image - Mirror in older versions of
PSP)
81. Pick Tool: (K) on your keyboard -Enter these parameters on the Toolbar
Position X 482-Position Y 64
82. Layers- Duplicate 83. Layers-Properties-Set the Blend Mode to "
Multiplikation "
84. Activate the layer underneath
85. Effects- 3D- Effects- Drop Shadow with these settings: 0, 0, 50, 50
color 3 (black)
86. Open the Tube : Castorke_tekst_petites_fleurs
87. Edit- Copy
88. Edit-Paste as new layer.
89. Place of your choice. 90. Add you watermark on new layer 91.
Image - Add borders-Symmetric checked: 1 Px -color 3.
92. Save as JPG Thank you for creating the lesson
Copying this lesson, in whole or in part,
without the author's permission is prohibited. ©Webdesign Diane
![]()
![]()
![]()
Respect their work, don't change anything about the tubes and don't say they
are your tubes
Leave credit with the creator.

![]()

on this we continue to work.


The lessons are registered with TWI.