Psp Div3_lesson 233
Translated by Marion into English and German
Thanks Marion
Translated by Sophie into French
Thanks Sophie
Click on the flag for the translation..
Any resemblance with an existing lesson is a coincidence
This tutorial was made with PSP 9, but can be done with other versions of Psp
The colours may vary significantly depending on the Psp used. . .
Without them, this lesson would not be possible.
Respect their work, don't change anything about the tubes and don't say they are your tubes
The copyright belongs to the original artist.
Leave credit with the creator.
Medhi Sorting Tiles
MATERIAL

Take me with you, I'll show you where you left off.
![]()

Place the Pattern 021408w in the pattern folder of your Psp files.
Color Palette:

1. Open castorke_les233_alpha channel
2. Duplicate ( SHIFT + D )
3. Close the original. We continue working on the copy.
4. Material Properties: Set your Foreground color to color 2
Set your Background color to color 1
5. Replace your Foreground color with a Foreground/Background Linear
gradient configured like this

6. Flood Fill Tool-Fill the Layer with the gradient.
7. Effects- Image Effects- Seamless Tiling using the default settings
8. Effects- Plugins- Mehdi/ Sorting Tiles
Block Ranges 50-150 , Block 120 , Crossed

9. Effects – Edge Effects – Enhance
10. Layers- New Raster Layer
11. Flood Fill Tool: Fill the layer with the Background color =1
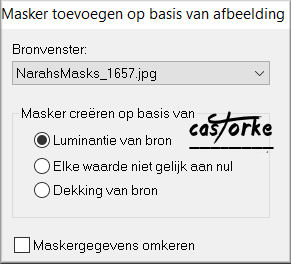
12. Open NarahsMasks_1657 and minimize.
13. Layers- New Mask Layer -From Image
14. Select : NarahsMasks_1657
15. Layers- Merge- Merge Group
16. Effects- 3D- Effects- Drop Shadow with these settings: 1, 1, 70, 0 Color 4
17. Effects – Edge Effects – Enhance
18. Effects-Texture Effects- Sculpture use the settings below=Color 2

19. Effects- 3D- Effects- Drop Shadow with these settings: 0, 0, 100, 0 Color 4
21. Selections/Load/Save Selection/Load Selection from Alpha Channel - selection # 1.
22.Flood Fill Tool- Fill the selection with color 3
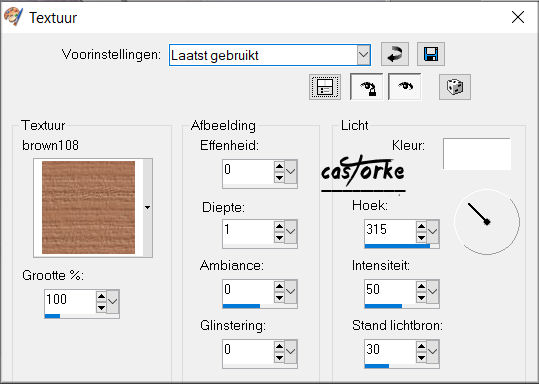
23. Effects-Textur Effects- Textur
select texture -Brown 108 use the settings below
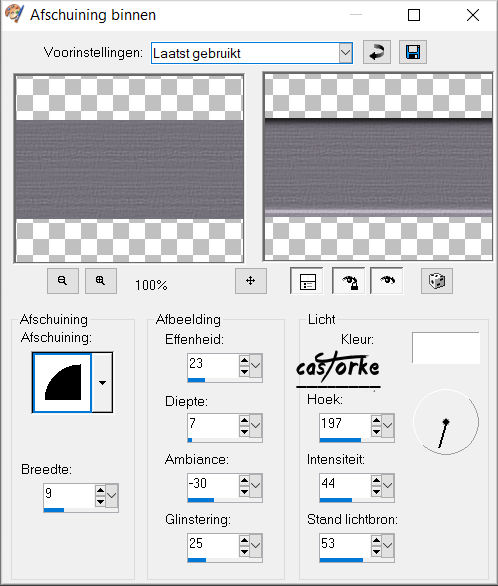
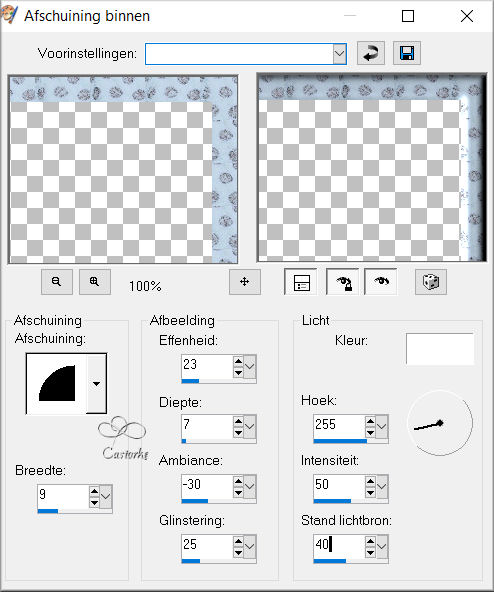
24. Effects- 3D-Effects- Inner Bevel with these settings
25. Selections- Deselect All
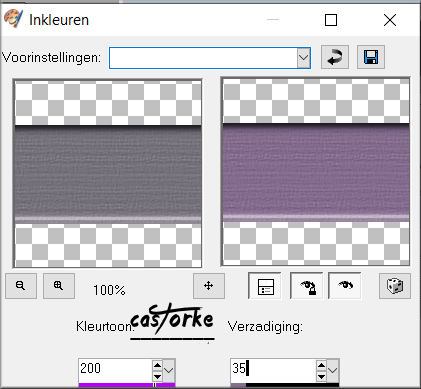
26. Adjust-Hue and Saturation-Colorize
Hue 200- Saturation 35
27. Open the Tube Callitubes-96dolls
28. Edit- Copy
29. Activate your work.
30. Edit- Paste as new layer
31. Image Resize 90 %
Resize all layers not checked
32. Pick Tool: (K) on your keyboard -Enter these parameters on the
Toolbar
Position X 162 --- Position Y 36

33. Effects- 3D- Effects- Drop Shadow with these settings: 0, 0, 75, 20 Color 4
34. Open the Tube : cas_les233_deco
35. Edit- Copy
-Activate your work
-Edit- Paste as new layer.
36.Place at top right
37. Layers- Duplicate
38.Image - Mirror - Mirror vertical ( Image - Flip in older versions of PSP)
39. Move to bottom.(see finished image)
40. Place your name or watermark
41. Image - Add Borders-Symmetric checked: 2 Px -Color 5
42. Image - Add Borders-Symmetric checked: 2 Px -Color 2
43. Image - Add Borders-Symmetric checked: 2 Px -Color 5
44. Selections- Select All
45. Image - Add Borders-Symmetric checked: 25 Px -Color 2
46. Selections- Invert
47. Material Properties: Set your Foreground color to color 5
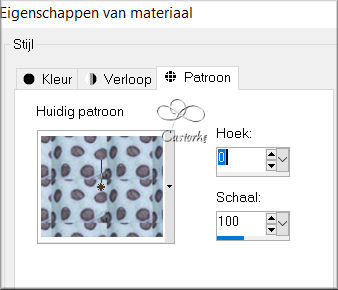
48. Open Pattern_233
49. Activate your work.
Material Properties: Pattern.
Select - patroon _233 with these settings
50. Activate Flood Fill Tool-Fill the selection with the pattern
51. Maybe you have to click three times in the selection
52. Effects- 3D-Effects- Inner Bevel with these settings Nr 2
53. Selections- Deselect All
54. Image - Add Borders-Symmetric checked: 5 Px Color 5
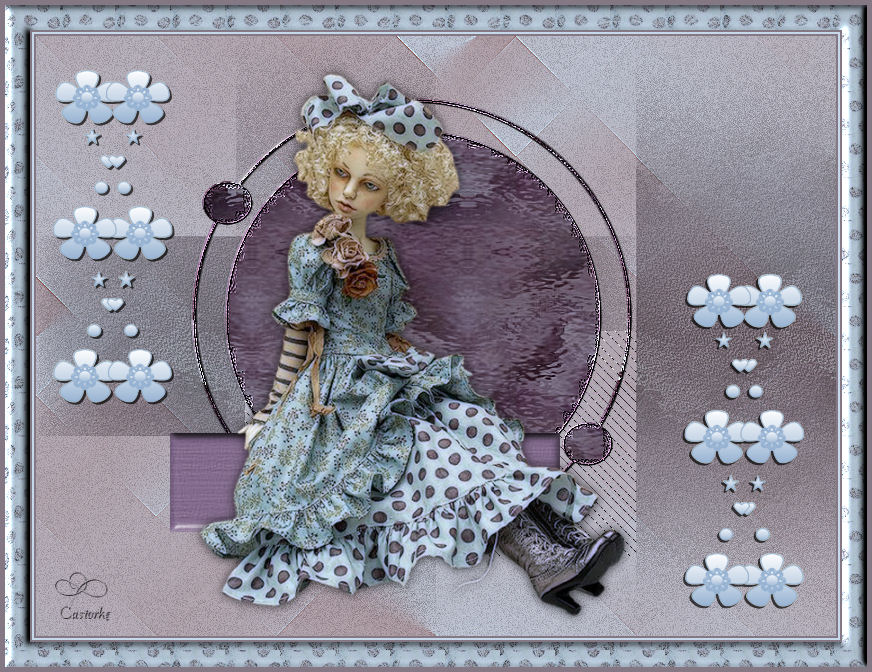
55. Save as JPG
Send it to me in original size.
I'll post it with the other examples.


Copying this lesson, in whole or in part, without the author's permission
is prohibited.
The lessons are registered with TW

©Webdesign Diane