Psp Div3_Lesson 198
Sophie translated this lesson into French
Thank you Sophie
Translated by Marion into English and German
Thank you Marion
Click on the flag for the translation
This lesson was written by myself
Any resemblance with an existing lesson is a coincidence
This tutorial was made with PSP 9 but can be done with other versions of Psp.
Without them, this lesson would not be possible.
Respect their work, don't change anything about the tubes and don't say they are your tubes
The copyright belongs to the original artist.
Leave credit with the creator.
Material here

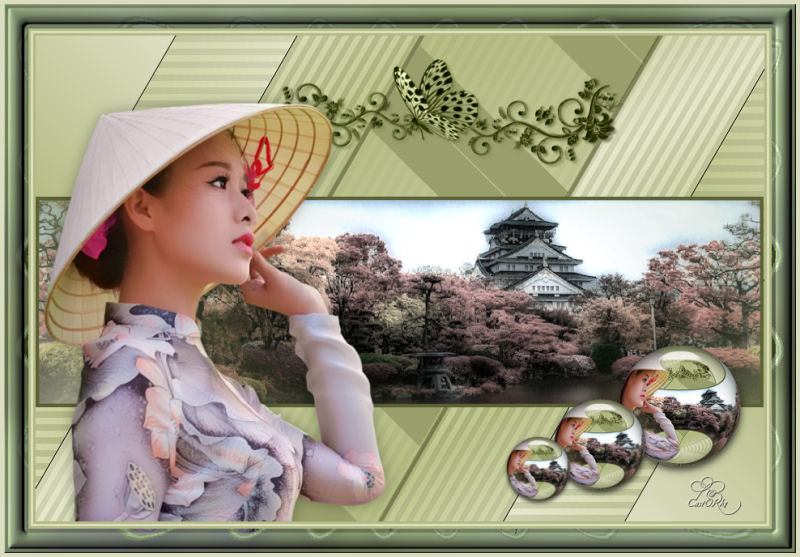
Take me with you, I'll show you where you left off.
![]()
- Window / Duplicate
- Close the originals and work with the copies

It is a change of colors that is why the color palette is so useful.
1. Open the color palette

2.Material Properties
Foreground color to color 1
Background color tot color 2
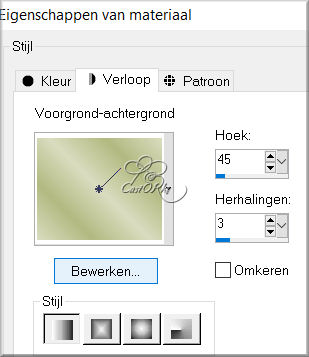
3. Replace your foreground color with a foreground/background linear gradient configured like this
Angle 45 , Repeats 3
4. Open lesson 198_alpha channel.
5. SHIFT + D we continue working on the copy
Close the original
6. Flood Fill Tool – Fill the layer with the gradient
7. Layers- Duplicate
8. Effects- Plugins-
Carolaine and Sensibility/ CS-HLines use the settings below
6, 6, 10

9. Layers- Duplicate
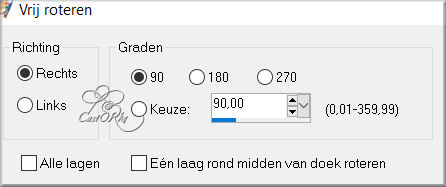
10. Image-Free Rotate- 90 Right
11. Effects-3D-Effects- Drop Shadow with these settings: 0, 1, 100, 0 Color 5 (black)
12.Repeat: Effects-3D-Effects- Drop Shadow with these settings: 0,(min) -1, 100, 0 Color 5 (black)
13. Layers- Merge- Merge Down
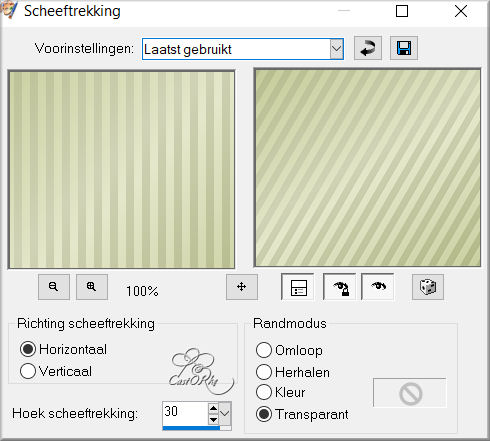
14. Effects-Geometric Effects-Skew use the settings below
15. Effects-3D-Effects- Drop Shadow with these settings: 0, 1, 100, 0 Color black
16.Repeat: Effects-3D-Effects- Drop Shadow with these settings: 0,(min) -1, 100, 0 Color black
17. Layers- New Raster Layer
18. Selections/Load/Save Selection/Load Selection from Alpha Channel - selection # 2
19. Flood Fill Tool-Fill the selection with color 3
20. Layers- New Raster Layer
21. Selections/Load/Save Selection/Load Selection from Alpha Channel - selection # 3
22. Flood Fill Tool-Fill the selection with color 2
23. Layers- Properties-Reduce the opacity of this layer to 70%
24. Layers- New Raster Layer
25. Selections/Load/Save Selection/Load Selection from Alpha Channel - selection # 4
26. Flood Fill Tool-Fill the selection with color 3
27. Layers- New Raster Layer
28. Selections/Load/Save Selection/Load Selection from Alpha Channel - selection # 1
29. Material Properties
Foreground color to color 1
Background color tot color 2
Replace your foreground color with a foreground/background linear gradient - Angle 45 , Repeats 3
Flood Fill Tool-Fill the selection with the gradient
30. Open the tube: les198_deco
31. Edit-Copy
32. Activate your work
33. Edit-Paste into Selection
34. Selections- Modify-Select Selections Borders
-Borderwidth 4 Px- -Inside
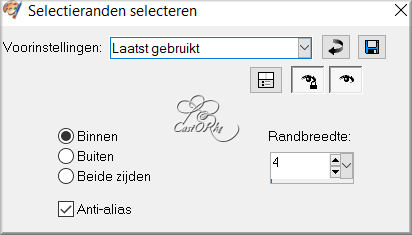
35. Flood Fill Tool-Fill the selection with color 3 (dark color)
36. Selections- Deselect All
37. Open the tube: 29e98e7711
38. Edit-Copy
39. Activate your work
40. Edit- Paste a new layer
41. Image Resize 80%
Resize all layers not checked
42. Place the tube in the top center..
43. Layers-Properties-Set the Blend Mode to " Luminance Legacy "
44. Layers- Duplicate
45. Open the tube : femmeAsie48-coly
46. Edit-Copy
47. Activate your work
48. Edit- Paste a new layer
49. Remove the logo. .
50. Image Resize 2 x 80%
Resize all layers not checked
51. Put at the bottom left (see finished image)
52. Effects-3D-Effects- Drop Shadow with these settings: 0, 0, 30, 25 Color 5 (black)
53. Edit-Copy Special-Copy Merged
54. Edit- Paste as new image !!!
55. Stay on this layer !!
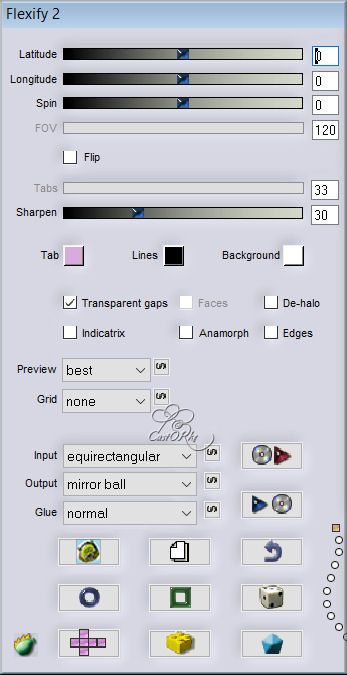
56. Effects- Plugins-
Flaming Pear/ Flexify 2 - Input equirectangular -Output / mirror ball
use the settings below
57. Edit-Copy
58. Return to your original work !!!
59. Edit- Paste a new layer
60. Image Resize 2 x 50%
Resize all layers not checked
61. Adjust-Sharpness-Sharpen
62. Effects- Plugins-
Eye Candy 5/ Impact/ Glass use the settings below

63. Move at the bottom right (see finished image)
64. Layers- Duplicate
65. Image Resize 75%
Resize all layers not checked
66. Move at the bottom right (see finished image)
67. Layers- Duplicate
68. Image Resize 70%
Resize all layers not checked
69. Move at the bottom right (see finished image)
70. Image - Add Borders-Symmetric checked: 3 Px- Color 2
71. Image - Add Borders-Symmetric checked: 3 Px- Color 1
72. Image - Add Borders-Symmetric checked: 3 Px- Color 2
73. selections- Select All
74. Edit-Copy !!!!
75. Image - Add Borders-Symmetric checked: 30 Px- Color 1
76. Selections -Invert
77. Edit-Paste into Selection .
78. Adjust-Blur- Gaussian Blur-Radius 30%
79. Effects- Plugins-Filters
Unlimited 2.0/ ,< &BKG Designers sf10 IV> / @Crumble - using the
default settings
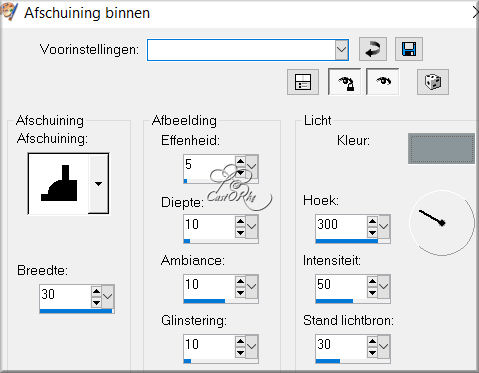
80. Effects-3D-Effects-Inner Bevel use the settings below
number 6 , Color 4
81. Selections- Deselect All
82. Image - Add Borders-Symmetric checked: 5 Px- Color 1
83. Place your watermark or name on a new layer
84. Layers- Merge- Merge All ( flatten)
85. Image Resize 800 Px width
Resize all layers checked
86. Save as JPG
I hope you enjoyed this lesson
Am curious about your work.
Send it to me in original size.
I'll post it with the other examples.
Please do include your name and the lesson number and title.
Send me a mail ,so I can see to the problem . Mail me


Copying this lesson, in whole or in part,
without the author's permission is prohibited.
The lessons are registered with TWI

©Webdesign Diane