Psp Div3_lesson 190

|
Translated into french by- Sophie van Evanescence
Click on the banner below.
![]()

Thanks Sophie
Translated by Marion In English and German
Thanks Marion.
Click on the flag for translation.
Thanks to the tubsters for the beautiful material
Leave credit with the creator.

Take me with you, I'll show you where you left off.
![]()

1. Open : Les190_-Colorenpallet.
2. Open: Castorke Alpha Channel" castorke_les190_alfakanaal.
3.
( SHIFT + D ) to duplicate-
on this we continue to work.
4. Close the original.
5. Material Properties: Set your Foreground color to color 2
Set your Background color to color 1
6. Effects- Plugins- Mehdi - Wavy Lab 1.1
Radial- Freq 2

7. Effects/ Image Effects- Seamless Tiling using the default settings
8. Adjust- Blur- Gaussian Blur-Radius 100
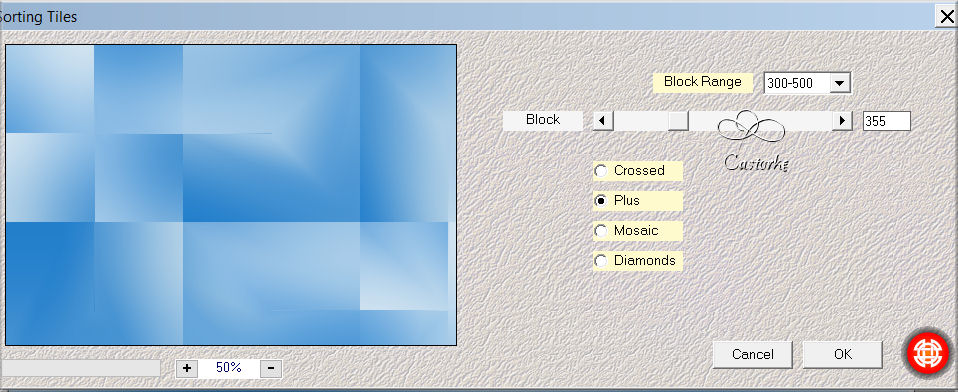
9. Effects- Plugins- Mehdi- Sorting Tiles
Block Range 300-500 Block 355 Plus checked
10. Effects- Plugins- Mehdi- Sorting Tiles
with same settings but Crossed checked
11. Selections/Load/Save Selection/Load Selection from Alpha Channel - Selection 1
12. Selections-Promote Selection to Layer
13. Adjust- Blur- Gaussian Blur-Radius 100
14. Layers-New Raster Layer
15.Material Properties: Change the Foreground Color to color 4 #ffffff (white)
Flood Fill Tool: Fill the Selection with the Foreground color =4
16. Selections- Modify-Contract 15 Px
17. Press Delete
18. Selections- Deselect All
19. Open the Tube : CAL-1573-102117
20. Edit- Copy.
21. Activate your work.
22. Edit-Paste as new layer
23. Pick Tool: (K) on your keyboard -Enter these parameters on the Toolbar
Position X 75 - Position Y min 50
24. Selections/Load/Save Selection/Load Selection from Alpha Channel - Selection 2.
26. Selections-Invert
27. Press Delete.
Selections- Invert
28. Layers-New Raster Layer
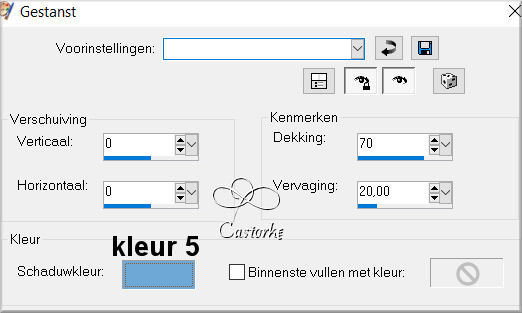
29. Effects-3D-Effects-Cutout use the settings below
30. Selections- Deselect All
31. Close the bottom layer by clicking on the eye.
32. Layers- Merge- Merge Visible
33. Open the eye of the bottom layer.
34. Activate the bottom layer = Raster 1
35. Layers-New Raster Layer
36. Flood Fill Tool: Fill the Layer with the Foreground color #ffffff =4
37. Open the Mask-masker M36_Pink and minimize.
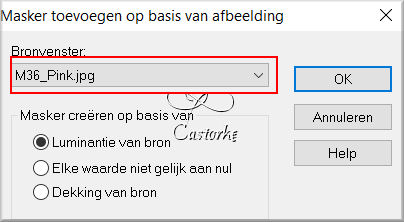
38. Layers- New Mask Layer-From Image and select mask : M36_Pink .
39. Layers- Merge- Merge Group
40. Effects-Edge Effects- Enhance
41. Layers- Properties-Lower the Opacity to 30%
42. Activate the bottom layer in the layer palette
43. Selections/Load/Save Selection/Load Selection from Alpha Channel -Selection 3
44. Selections-Promote Selection to Layer.
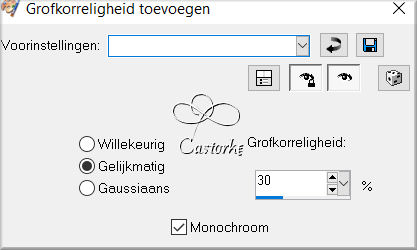
45. Adjust- Add/Remove Noise-Add Noise 30 Uniform checked
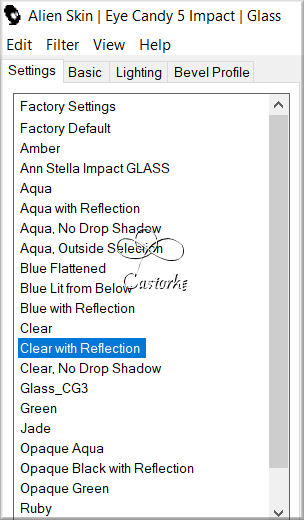
46. Effects- Plugins- Eye Candy5/ Glass/Clear with Reflection
47. Selections- Deselect All
48. Layers- Arrange- Bring to Top
49. Image/ Resize 3 x 85%
Resize all layers-NOT Checked.
50. Pick Tool: (K) on your keyboard -Enter these parameters on the Toolbar
Position X 660 - Position Y 260
51. Layers- Duplicate
52. Pick Tool: (K) on your keyboard -Enter these parameters on the Toolbar
Position X 705 - Position Y 310
53. Layers- Duplicate
54. Pick Tool: (K) on your keyboard -Enter these parameters on the Toolbar
Position X 760 - Position Y 360
55. Open the Tube : b2n2s_wc_string
56. Edit- Copy.
57. Activate your work.
58. Edit-Paste as new layer
59. Image/ Resize 85%
60. Pick Tool: (K) on your keyboard -Enter these parameters on the Toolbar
Position X 525 - Position Y 400
61. Adjust-Hue and Saturation-Colorize with these settings: 159 -250
62. Effects-3D-Effects-Drop Shadow with these settings: 1, 1, 75, 0 Color Black
63. Image - Add Borders-Symmetric checked: 3 Px -Color 5
64. Image - Add Borders-Symmetric checked: 2 Px -Color 4
65. Image - Add Borders-Symmetric checked: 3 Px -Color 5
66. Selections- Select All
67. Image - Add Borders-Symmetric checked: 50 Px -Color 4
68. Selections-Invert
69. Open the Tube : les190_deco
70. Edit- Copy
71. Activate your work.
72. Edit-Past into Selection
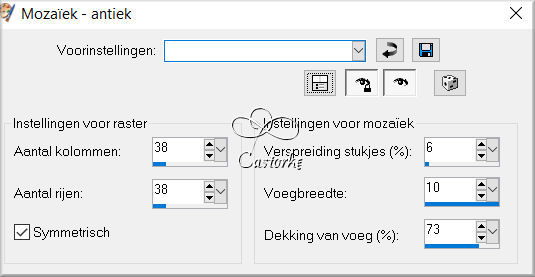
73. Effects- Tecture Effects-Mosaic -Antique use the settings below
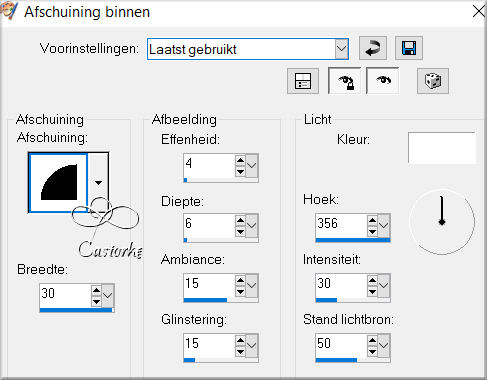
74. Effects-3D-Effects-Inner Bevel use the settings below
75. Selections-Deselect All
76. Open the Tube: woman-Gabry 101
77. Edit- Copy.
78. Activate your work.
79. Edit-Paste as new layer
80. Image- Resize 85%
81. Pick Tool: (K) on your keyboard -Enter these parameters on the Toolbar
Position X 13 - Position Y 128
82. Adjust-Sharpness- Sharpen More
83. Effects-3D-Effects-Drop Shadow with these settings: 0, 0, 75, 40 Color Black
84. Image - Add Borders-Symmetric checked: 3 Px -Color 5
85. Image - Add Borders-Symmetric checked: 2 Px -Color 4
86. Image - Add Borders-Symmetric checked: 3 Px -Color 5
87. Image - Add Borders-Symmetric checked: 20 Px -Color 4
88. Place your name or watermark.
89. Image- Resize 900 Px
Resize all layers-NOT Checked.
90. Save as JPG
Am curious about your work.
Thank you for creating the lesson..


Copying this lesson, in whole or in part,
without the author's permission is prohibited.
The lessons are registered with TWI.

©Webdesign Diane