Psp Div3_lesson 175

|

Translated by - Marion into Engels, Duits.
Klik op de vlag voor de vertaling.
Respect their work, don't change anything about the tubes and don't say
they are your tubes Take me with you, I'll
show you where you left off.
1. Open Castorke Alpha Channel" castorke_les175_alfakanaal.
2. Duplicate ( SHIFT + D )
3. Close the original.
4. Material Properties: Set your Foreground color to color #ceafc3
5. Set your Background color to color #ffffff
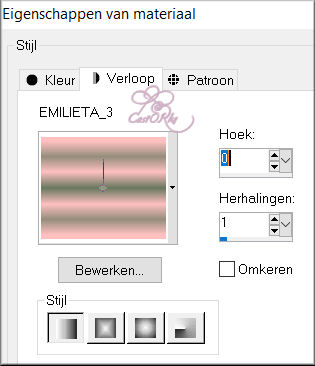
6. Color Palette: Set your foreground color to gradient and select : Emilieta_3
Prepare a linear gradient configured like this
7. Flood Fill Tool: Fill the layer with the gradient
8. Effects/ Image Effects- Seamless Tiling using the default settings 9.
Layers- New Raster Layer.
10. Selections/Load/Save Selection/Load Selection from Alpha Channel - selectie 1
11. Open " 2paisd3 " 12. Edit-Copy
13. Activate your work
14. Edit - Paste into Selection
15. Layers- New Raster Layer.
16. Flood Fill Tool: Fill the selection with #ffffff
17. Selections/ Modify/ Contract 10 Px 18. Delete
19. Selections/ Select none
20. Layers- Merge- Merge Down 21. Effects- 3D- Effects- Drop Shadow with
these settings: 3, 3, 100, 25 color black 22. Repeat: Effects- 3D-
Effects- Drop Shadow with these settings: -3, -3, 100, 25 color black
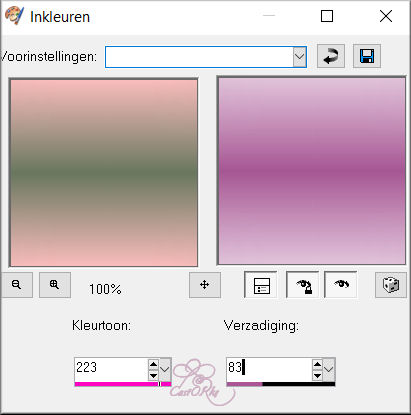
23. Activate the bottom of the layer palette 24. Adjust/ Hue and
Saturation/ Colorize with these settings: 223 83
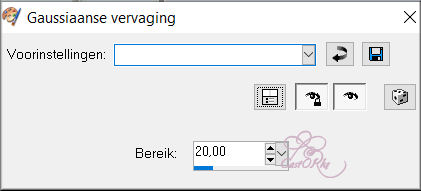
25. Adjust-Blur Gaussian Blur-Radius 20
26.Selections- Select All.
27. Layers- New Raster Layer.
28. Layers- Arrange- Bring to Top 29. Effects-3D-Effects-Cutout- Opacity 50
Blur 100
30. Selections- Select None 31. Open the tube "0_133d18_f3876d0a_XL5
" 32. Edit-Copy 33. Activate your work 34. Edit - Paste as new layer
35. Image/ Resize/ 2 x 85%
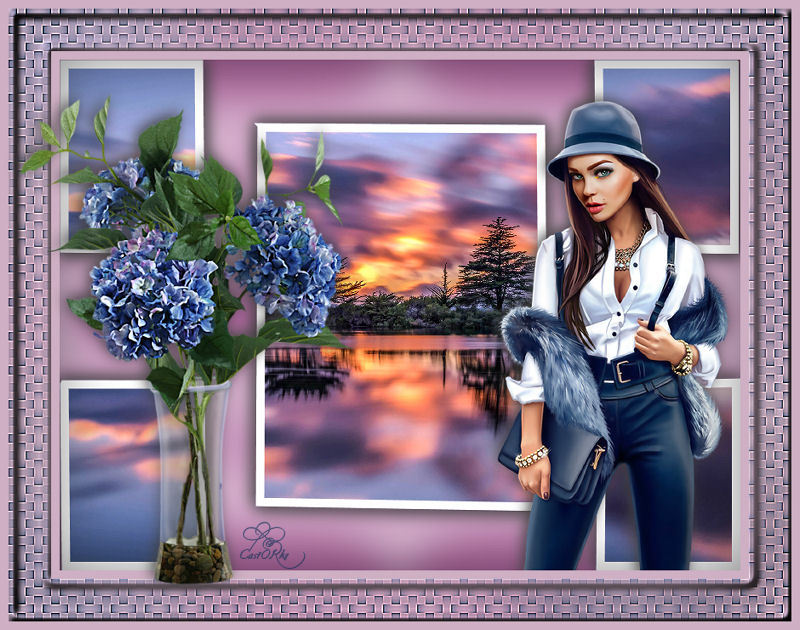
Resize all layers-NOT Checked 36. Move to the right side (see finished
image)
37. Effects- 3D- Effects- Drop Shadow with the same settings.
38. Image - Add Borders-Symmetric checked: 10 Px -Foreground color #ceafc3
39. Selections-Select All 40. Edit-Copy
41. Image - Add Borders-Symmetric checked: 50 Px -Foreground color #ceafc3
42. Selections- Invert 43. Layers- New Raster Layer 44. Edit - Paste
into Selection ( is still in memory)
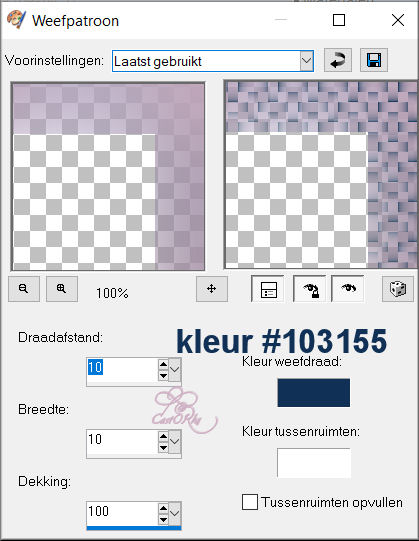
45. Adjust- Blur-Gaussian Blur- Radius 50%.
46. Effects -Texture Effects- Weave use the settings below Fillgaps NOT
checked !
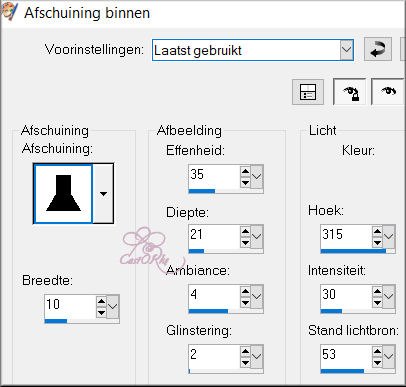
47. Adjust- Sharpeness-Sharpen More 48. Repeat: Adjust-
Sharpeness-Sharpen More 49. Effects-3D-Effects-Inner Bevel use the
settings below 50. Selections- Select None 51. Image - Add Borders-Symmetric checked: 10 Px
-Foreground color #ceafc3
52. Open the tube " CAL-2972-081918 " 53. Edit - Copy- Activate your work
-Edit - Paste as new layer
54. Put the tube in its place 55. remove the watermark 56. Effects- 3D-
Effects- Drop Shadow with the same settings.
57. Image/Resize 800 Px width-Resize all layers checked
58. Plaats je naam of watermerk.
59. Opslaan als .jpg
Please do include your name and the lesson number and title. ©Webdesign Diane
![]()
![]()

Without them, this lesson would not be possible.
The copyright belongs to the original artist. Leave credit with the creator.

![]()
Open the tubes in a map of your choice or in the program PSP.

Please post it below as an example.


Copying this lesson, in whole or in part,
without the author's permission is prohibited.
The lessons are registered with TWI.